Controller Firmware Upgrading

1.0 PXL Controllers

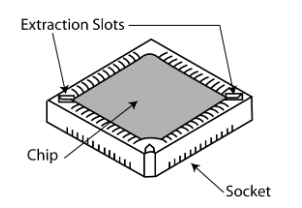
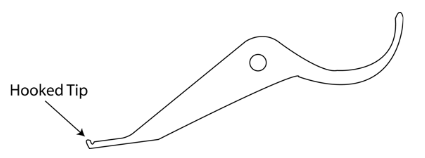
PXL controllers do not have flash firmware and so they require a physical chip change. The PXL Firmware Upgrade ship kit comes with a chip extraction tool to assist with the removal and replacement of chips - failure to use the extraction tool properly may permanently damage the chip and/or the socket.


  1. Locate the socket with the chip to be replaced. Notice the rectangular slot in two of the chip corners. These are the slots in which the extraction tool is placed.


  1. The extraction tool has a small hook at one end. This is the end that is to be inserted into the extraction slots of the chip socket.


  1. It is important to use the extraction tool at the proper angle in order not to damage the chip and socket.


  1. Insert the hooked end of the extraction tool into one of the extraction slots of the socket until it touches the bottom of the socket.
  2. With slight downward pressure, gently rotate the tool away from the chip until the corner of the chip lifts away from the socket.


  1. Repeat step 5 on the opposite extraction slot.


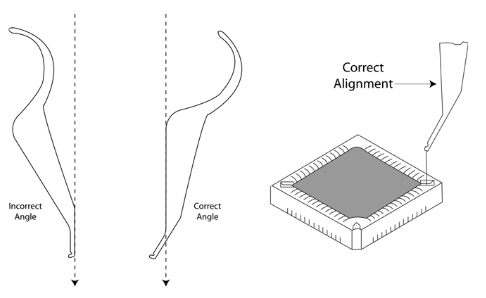
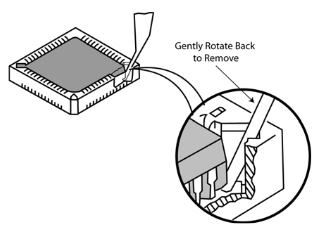
Important Note: DO NOT attempt to completely extract the chip from the socket on the first extraction. Lift from one side until the corner is above the socket, then repeat the procedure on the opposite corner. If necessary, repeat the procedure on each side until the chip is completely free of the socket.


2.0 NXT Controllers

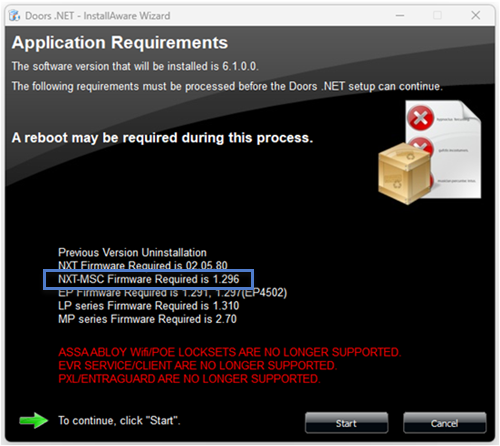
When you run the Doors.NET installer you will see an Application Requirements window. This window will inform you if standard NXT controllers need a firmware upgrade and the version they should be upgraded to.


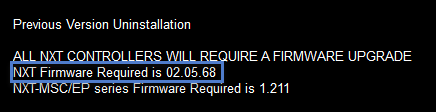
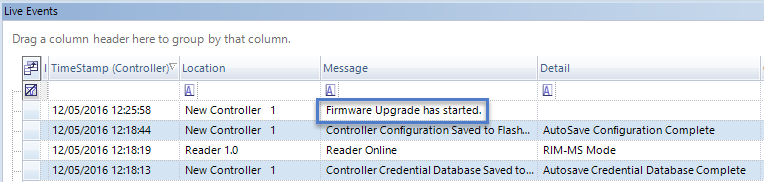
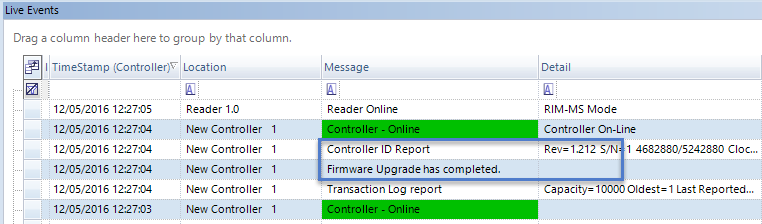
There will also be a notification in the Live Events grid if the controller needs a firmware upgrade.


During the upgrade the latest firmware versions will be installed into the C:\Keri\DoorsNET\Firmwarefolder.


  1. Once the install/upgrade has completed, log into the software and go to Setup >> Hardware Setup >> All.


  2. Highlight the controller listed in the hardware tree.
  3. Click the Firmware Upgrade icon.


  1. The Firmware Upgrade tab will appear.
  2. The controller(s) will appear and their current firmware version will be shown.


  1. Select the controller or controllers that need to be upgraded (you can select multiple controllers using the Select All check box)
  2. Select the new firmware file and click the Apply button.


  1. A task verification window appears. Click Yes to continue.
  2. A progress bar will appear on the right side of the selected controller indicating the progress of the firmware upgrade.


  1. The firmware upgrade is complete once the progress bar has reached 100% and the new firmware version will be displayed.


3.0 NXT Mercury Powered Controllers

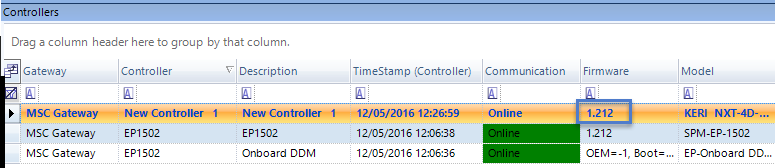
When you run the installer you will see a notification if the MSC controller firmware needs upgrading.


You will also see a notification in live events when a new controller is added to the system.


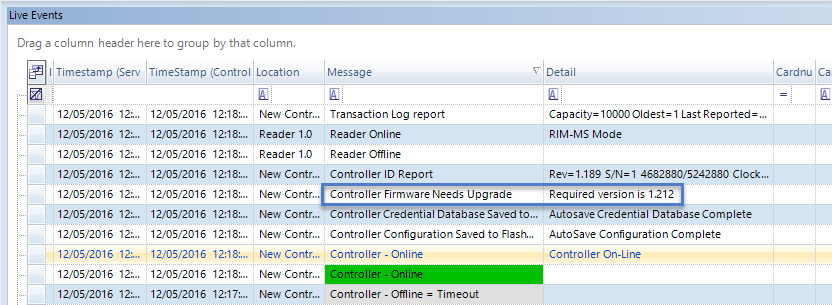
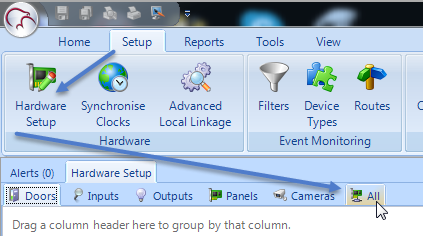
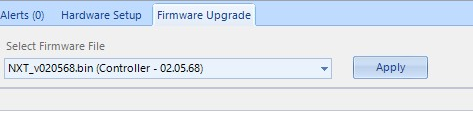
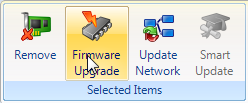
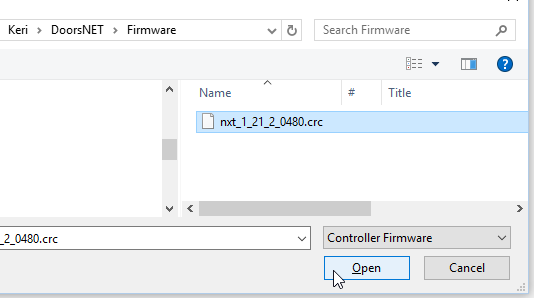
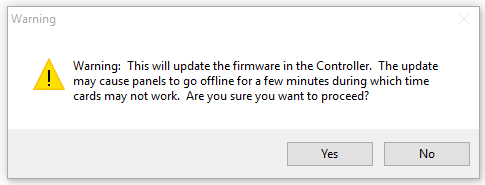
Perform the following steps to upgrade the controller firmware.


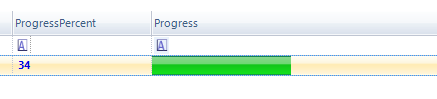
Note:It takes approximately 2 minutes to upgrade the controller firmware but there is minimal system downtime because the controller will continue to function throughout most of the upgrade process. There is just a few seconds at the end of the process where the controller will not be functioning, during which time the controller will go offline then back online again.


  1. If a firmware upgrade is required, the required revision is listed in the Status Messages grid.
  2. Highlight the controller in the hardware tree.
  3. Click on the Firmware Upgrade icon on the toolbar ribbon.


  4. Windows Explorer automatically opens a window where the new firmware revision resides.
  5. Select the correct .CRC file and click Open.


  6. A notification message appears stating that the controller will go offline momentarily. Click YES and the new firmware file will be sent.


  7. Go to live events and you will see a Firmware Upgrade Has Started message.


  8. Within approximately 2 minutes you will then see a Firmware Upgrade has Completed message (followed by numerous messages that are generated as the controller performs a self test).


  9. Go to the Controllers grid and you will see that the new firmware version will be shown.


Your MSC controller is now ready for configuration and operation


Note: Typically a firmware upgrade is to a newer version, but downgrading to an older version is allowed. However each Doors.NET software revision has minimum firmware revision requirements. Proper software and hardware operation is not guaranteed if you downgrade to a firmware revision that is out-of-date for the software revision installed.


4.0 Mercury Controller Firmware Updates

Doors.NET also detects out-of-date Mercury EP, LP and MP controller firmware and Doors.NET includes the latest supported and approved Mercury firmware. Upgrading the firmware on Mercury controllers is the same procedure as with NXT-MSC controllers.


Notes: