Upgrading the Installed SQL Version
1.0 Introduction
Windows 11 requires Doors.NET to use SQL/SQL Express 2019. Any upgrade installations will use the SQL version that was installed at the time of installation (this will typically be SQL 2016). For this reason, SQL will need to be upgraded to SQL 2019.
Notes:
- A new install of DNET v4.8 (as well as 4.9, 5.0) will install SQL 2019 Express (if a 64-bit machine). Upgrades of DNET v4.4 and below will require the SQL version to be upgraded.
- If you have an older version of Doors.NET (v4.4.0) and then you upgrade to v4.8.0, v4.9.0 or v5.0.0, the installation most likely be using SQL 2016. This document explains how to upgrade the installed SQL version to SQL 2019.
-
When upgrading to SQL Server 2019 Express, you must first choose the Custom install option, then the “Upgrade from a previous version of SQL Server" option. Otherwise you will end up with two SQL Server versions and the Eclipse instance (which contain the Doors.NET database) will still be located in the older SQL version.
2.0 Download SQL Express 2019
- Go to a search engine and enter: 'SQL Express 2019 download'.
- Click on the link to the appropriate Microsoft website location.
Note: At the time of writing, this URL is: https://www.microsoft.com/en-gb/download/details.aspx?id=101064
- Click on the DOWNLOAD button.
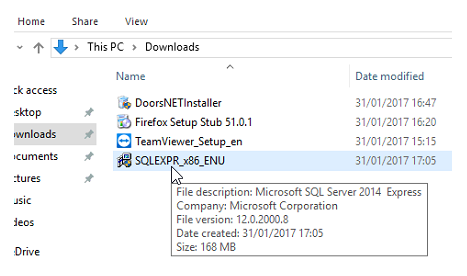
- The SQL Express 2019 installation file will download to your PC.
- Typically the file will be found in the 'Downloads' folder.
3.0 Install SQL Express 2019
- Double-click the installation file.
- Select CUSTOM as the installation type.
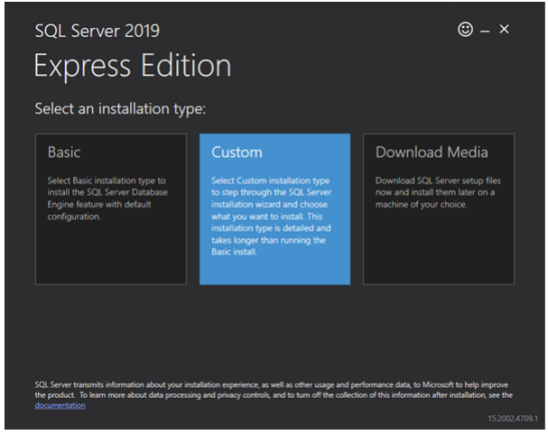
-
Accept the default download location for the SQL Express installation media (the default location is: C:\SQL2019 ).
- Click the INSTALL button and the installation package will be downloaded.
-
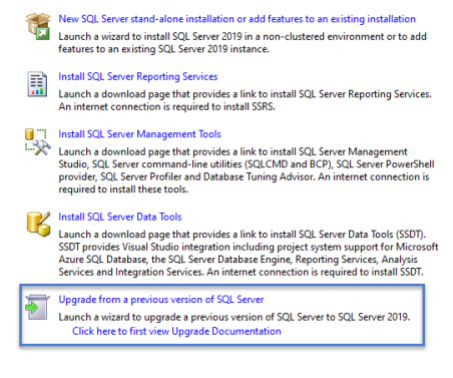
The installation center window will appear.
- At the bottom of the list of options, select: 'Upgrade from a previous version of SQL Server'.
-
Place a check mark to accept the license terms and conditions.
- Click the NEXT button.
-
Place a check mark to use Microsoft Update to check for updates.
- Click the NEXT button.
-
The installer will now check for updates.
- Next, ensure the ECLIPSE instance is detected and displayed. The current version will most likely be 13.x.xxxx.x.
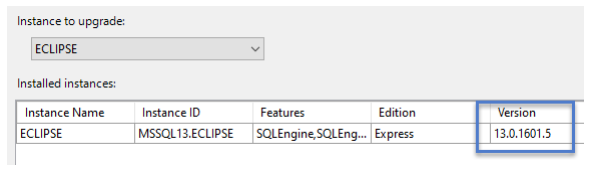
-
Click NEXT.
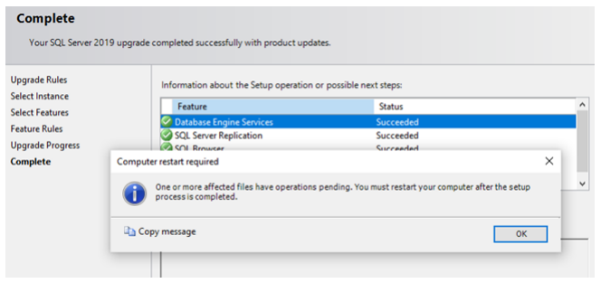
- You should see a message that the SQL 2019 upgrade has succeeded successfully.
-
You will also see a prompt to restart the host PC. Click OK to confirm this.
- Click the CLOSE button.
- Reboot the PC.